Scrollbar in Tk (tkinter)
The scrollbar is a Tk widget that allows you to modify the visible area (called viewport) of other widgets. A scrollbar can be vertical or horizontal, and is typically attached to widgets that display multiple elements, lines, or columns, such as listboxes (tk.Listbox), tree views (ttk.Treeview) or multi-line textboxes (tk.Text). In this post you will learn how to create and configure scrollbars.
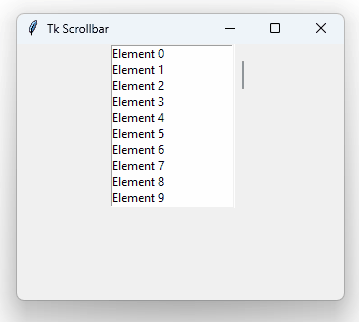
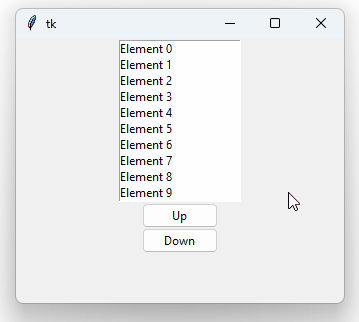
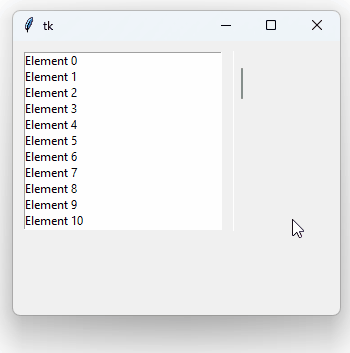
To introduce the necessary concepts to understand scrollbars, we will work with one of the widgets that lets us display multiple items: the listbox. The same concepts apply to the other widgets supporting scrolling. Here is a simple program that creates a window and a listbox with 100 elements:
|
import tkinter as tk
|
|
|
|
root = tk.Tk()
|
|
root.geometry("400x300")
|
|
listbox = tk.Listbox()
|
|
listbox.insert(tk.END, *(f"Element {i}" for i in range(100)))
|
|
listbox.pack()
|
|
root.mainloop()
|
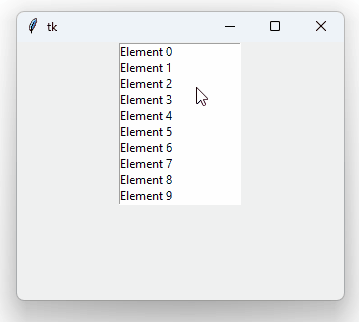
After running the program, you will see that the listbox only manages to display a handful of elements, although Tk doesn't add a scrollbar automatically. However, you can scroll the listbox vertically using the middle mouse button by placing the cursor on top of the widget:
This means that the procedure to move the visible area of a widget is already built in Tk. We just need to create the scrollbar and connect it with the proper widget. The visible area of a widget, called the viewport, is the part of the widget that is displayed to the user. The visible area of a widget can be equal to the total area if the size of the widget is large enough to display its whole content. In the previous image, we see that the listbox has a total of 100 elements, but the visible area only shows 10 items at a time, so the visible area represents one tenth (1/10) of the total area. However, the visible area will match the total area when the list has 10 items or less, or if we increase the size of the listbox.
Internally, Tk records the visible area of each of widget, for which it uses two ranges: one for the vertical area, the other for the horizontal area. For simplicity, let's now deal only with the vertical area. Ranges managing the visible area of a widget extend, at most, from 0.0 to 1.0. When the range is 0.0-1.0, the visible area matches the total area of the widget, i.e., no element is left out of the visible area. The first number of the vertical range indicates the upper bound of the widget's total area, while the second number specifies the lower bound. Thus, as soon as we execute the above code, the listbox's visible area is 0.0-0.1:
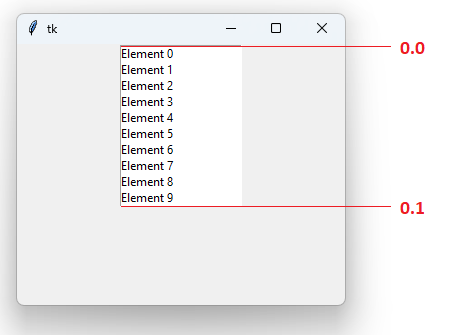
The range being 0.0-0.1 means that only the first 10% of the total area of the widget is visible. Because of the size of this specific listbox, the visible area is always 10% of the total area. However, the range changes as we scroll down: both limits increase until they reach 0.9-1.0, in which range the last 10 items of the listbox are displayed. Nevertheless, the ratio doesn't change as long as the size of the widget remains always the same: the difference between the second number and the first is always 0.1 (10%). With the following code we can see how the range changes as we scroll through the listbox:

The tk.Listbox, tk.Text, tk.Canvas, and ttk.Treeview widgets include the yscrollcommand argument, which lets us pass a function that will be invoked every time the visible area of the widget changes. Thus, our display_range() function receives the two bounds of the range as arguments (a and b) each time the user scrolls through the listbox.
Conversely, the yview() can be used to change the visible area of a widget. For example:
The "moveto" first argument means that we want to move the visible area of the widget, while the second argument is a number between 0.0 and 1.0 indicating the first number in the range of the visible area. The second number in the range is automatically calculated based on the size of the widget. Based on the current size of our widget, the range of the visible area will be 0.82 - 0.92. To see it better, we might add a textbox (ttk.Entry) to let us set the listbox's viewport when pressing Enter:
Note that the first number in the range matches the element number: if the range starts at 0.0, the first element displayed is element 0; if the range starts at 0.25, element 25 is the first to be displayed; and so on. But this (intentional) coincidence happens only because the listbox has exactly 100 elements. Had it 50 elements, a range starting at 0.8 would display element 40 as the first element in the viewport (because 80% of 50 is 40, 50*0.8 == 40), while a range starting at 0.40 would display element 20, and so on.
Furthermore, the yview() method allows you to scroll the visible area of a widget by "units" when the first argument is "scroll. The exact definition of what a unit is depends on the widget being scrolled. In listboxes, a unit is equivalent to an element. Positive unit numbers move the visible area down, while negative numbers scroll it up. For example, the following code uses two buttons to let the user scroll the listbox's viewport up and down:
Horizontal scrolling works exactly the same by using the xview() method and xscrollcommand parameter.
Scrollbar Widget
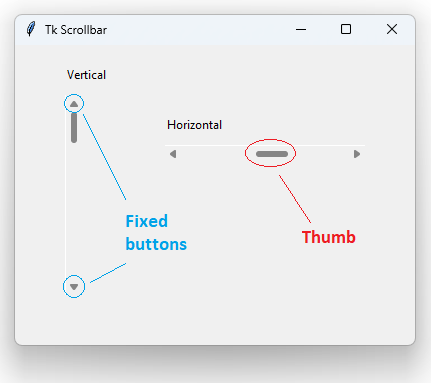
Now that you know the fundamental concepts related to scrolling the visible area of a widget, let's take a look at the scrollbar widget itself. Tk provides two widgets with the same functionality: tk.Scrollbar and ttk.Scrollbar. They just differ in the way their instances can be styled. However, what we have seen so far and what we will explain below are valid for both classes. The scrollbar is the preferred widget for controlling the visible area of a listbox, table, text box, or any other widget that supports scrolling. It can be vertically or horizontally oriented, and is generally made up of two fixed buttons placed in the edges and one button that can be dragged across a channel or trough. The draggable button is known as thumb. Under some operating systems, scrollbars have no fixed buttons, but just a thumb. On Windows 11, for example, the fixed buttons are only visible while hovering the scrollbar.
The scrollbar works, just like the widgets in the previous section, with a range between 0.0 and 1.0 indicating what the position and size of the thumb are. When the range is 0.0-1.0, the thumb spans along the entire trough. As the first number in the range increases, the thumb moves down (in vertical scrollbars) or to the right (horizontal). The difference between the second and the first number of the range indicates how big the thumb is. So, if we set the range of a scrollbar to 0.2-0.5, the size of the thumb will be 30% (since 0.5-0.2 == 0.3) of the size of the trough (i.e., 30% of the size of the scrollbar, without the fixed buttons):
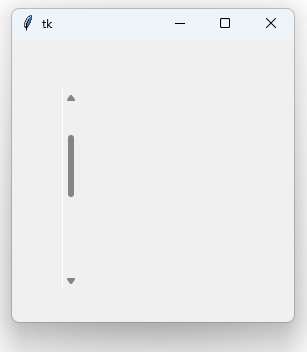
The orient argument specifies the orientation of the scrollbar: tk.VERTICAL or tk.HORIZONTAL. The set() method sets the range of the scrollbar. This is the result:
It's easy to see that the fixed buttons do the job of our former button_up and button_down widgets in the previous section. We can even associate the press event of those buttons via the command parameter and we will see that they generate the same three arguments that we had passed to listbox.yview() to scroll the listbox's viewport by units:
This is no coincidence: the event raised when pressing the scrollbar's fixed buttons is precisely intended to be connected to the yview() or xview() methods of the widget whose visible area you want to alter. Thus, with the following code we have a partially-working bar to scroll elements in a listbox:

However, you might have noticed that the thumb does not move and has always the same size. This happens because we have not called scrollbar.set(), so the scrollbar does not know what the range of the visible area of the listbox is. Fortunately, we saw that the tk.Listbox class constructor supports the yscrollcommand parameter, which receives a function that will be called whenever the visible area of the widget is altered. So, if we connect that parameter with the scrollbar.set() method, we'll get the scrollbar's thumb to update its size and position every time the listbox's viewport changes:
That's great! We not only get the thumb to update every time the visible area of the listbox changes, but also the visible area to change when dragging the thumb of the scrollbar. This is possible because Tk also calls the function passed to the command parameter when the user drags the thumb around the channel, but in this case passing "moveto" as the first argument and as the second argument a number between 0.0 and 1.0 indicating the start of the range of the visible area. This was the first way we saw that the yview() method could scroll the visible area of a widget.
Better organized with classes
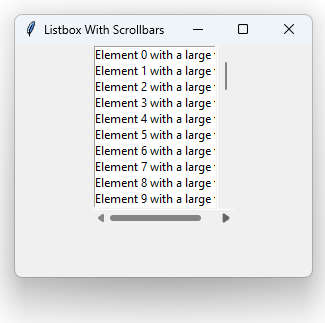
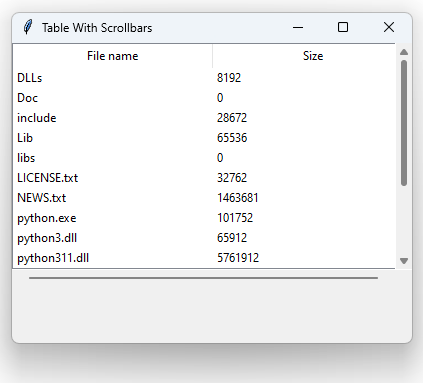
Putting all the pieces together, we can implement a handful of classes that allow us to create listboxes, tree views, and text boxes with horizontal and vertical scrollbars and insert them into a window without disturbing remaining widgets.
Listbox with horizontal and vertical scrollbar:
Multi-line textbox (tk.Text):

Styles
Styling a scrollbar is possible under some operating systems and themes.
To customize the appearance of ttk.Scrollbar instances, we need to configure the TScrollbar style. We might also discriminate between vertical or horizontal scrollbars by using the specific Vertical.TScrollbar and Horizontal.TScrollbar style names. For example:
Note that:
Some configuration options might not be available in certain themes.
The theme that Tk uses by default in Windows does not support styling as it works with native widgets.
The tk.Scrollbar classic widget supports the following arguments for styling:
Neither of these options is recognized in Windows.