Creating and Setting Up a Django Project
Developing a new website in Django requires a series of initial steps that can be somewhat tedious and confusing when getting started with the framework: creating the project, setting up an application, configuring the URLs, etc. Here is a quick and easy to follow guide that can be used as reference every time you need to start a new project.
Create a new directory and open a new terminal in there.
Create a virtual environment and install Django:
This step can be skipped if you want to use the system's Python interpreter and Django is already installed.
Create the new Django project (named
myprojectin this example; change as desired) using thedjango-admincommand and enter the project folder:
Create a new Django app (named
myapp) inside the project:
Remember that Django distinguishes between projects and applications. An application is a Python package with a certain structure (models, views, templates, etc.). A project is (besides a Python package) a set of applications with a common configuration (for example, they might all share the same database(s)). A Django project must have at least one application configured.
Open the
myproject/settings.pyfile with your favorite code editor and install the newly created application in the project:
Create some test view in the new app by writing the following inside
myapp/views.py:
|
from django.http import HttpRequest, HttpResponse
|
|
|
|
|
|
def index(request: HttpRequest) -> HttpResponse:
|
|
return HttpResponse("Hello, world!")
|
Create the file
myapp/urls.pyand associate the newly created view with some path:
|
from django.urls import path
|
|
|
|
from . import views
|
|
|
|
|
|
urlpatterns = [
|
|
# An empty string means the home URL.
|
|
path("", views.index, name="index")
|
|
]
|
In the
myproject/urls.pyfile (which is not the same asmyapp/urls.py!) we will probably find something like:
|
from django.contrib import admin
|
|
from django.urls import path
|
|
|
|
urlpatterns = [
|
|
path('admin/', admin.site.urls),
|
|
]
|
Add the URLs defined by your application:
|
from django.contrib import admin
|
|
from django.urls import path, include
|
|
|
|
urlpatterns = [
|
|
path('admin/', admin.site.urls),
|
|
path("", include("myapp.urls"))
|
|
]
|
Start the Django development server:
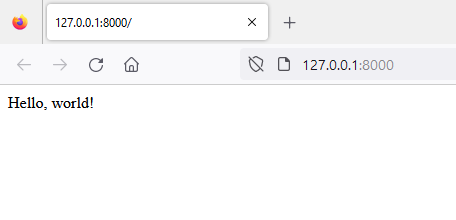
Go to http://127.0.0.1:8000/ and watch the result of your view:

That's it! We already have a fully configured Django project to start developing.
You might also find interesting our Django tutorial!